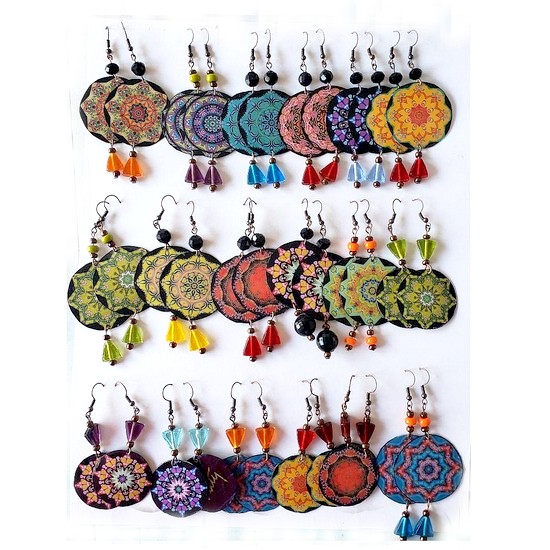
These fun earrings are made with (FREE) packaging material and mandala images I purchase from Etsy or found free on the internet.


I never throw away clear plastic packaging material! It can be used for lots of projects and takes just a few minutes to preserve with a razor blade that I keep handy.
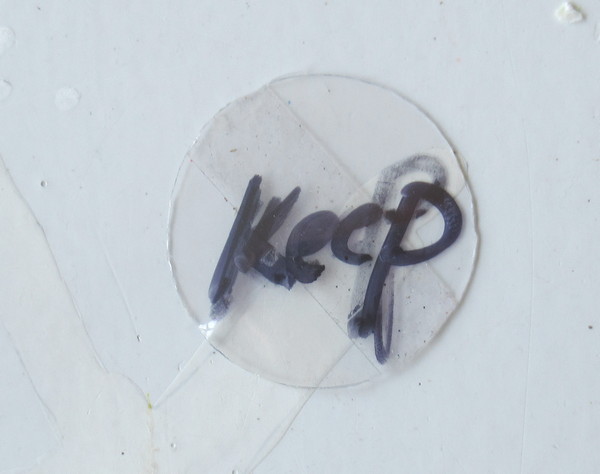
This is my original pattern, it is in rough shape because I’ve made LOTS of earrings! I write KEEP so the clear plastic doesn’t get tossed. LOL I wish my punch worked better….I have given up on it and just use this template to cut a circle of repurposed plastic for my earrings.

I purchase sheets of mandalas from Etsy and print out pages of them.

Step One: Cut out plastic circles and clean with vinegar to remove all oils.
Step Two: Cover each mandala image (don’t cut it out from your computer printout page yet) with Diamond Glaze (my favorite) or Mod Podge. Place the plastic circle on top smoothing so there are no air bubbles. Let completely dry. TIP: When I make these earrings I glue plastic circles to the whole print out page at one time to make 48 sets.
Step Three: Now you can cut the mandala from the printout sheet and cover the back side with Diamond Glaze or Mod Podge and let that dry completely. When you cut the mandala and plastic you can make sure the piece is perfectly round following the edge of the clip art mandala.
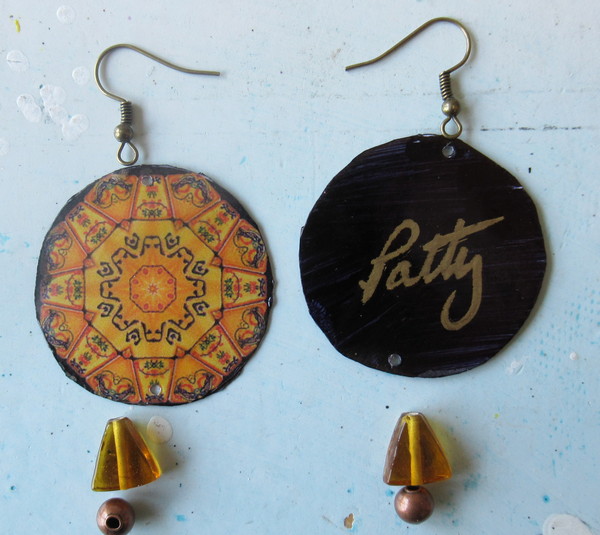
Step Four: After the back of the mandala is completely dry, punch tiny holes in the top and bottom.
Step Five: Cover the back of the mandala with black felt pen, I use a wide tip felt pen that is very “juicy” and sign them.
Step Six: Assemble the earrings!
Since there is so much drying time, I make a big batch (usually 2 pages of print outs) of mandalas at a time so I can work on them “assembly line” style. I assemble a bunch of them and have many sets leftover to work on later when I need them.
CLICK AND PRINT:


Wow! I just love how you turn recycled materials into jewelry!
LikeLike